Contents:
- Why Understanding Hair Cutting Matters
- Essential Tools: Why Quality Scissors Make the Difference
- Preparation: The Foundation of Every Good Cut
- How to Cut Men’s Hair with Scissors: Core Techniques
- Scissor-Over-Comb Technique
- Point Cutting
- Slide Cutting
- Step-by-Step Cutting Process
- Establish Your Guide
- Work the Sides
- Define the Back
- Taper the Hairline
- Shape the Top
- Final Check and Dry Cut
- Common Mistakes to Avoid
- How to Cut Men’s Hair with Scissors for Different Styles
- Classic Short Crop
- Textured Quiff or Pompadour
- Longer Casual Length
- Aftercare and Sustainability Considerations
- FAQ: Common Questions About Cutting Men’s Hair with Scissors
- Taking Your Skills Forward
The sound is unmistakable—that soft, precise snip of quality scissors gliding through hair, each cut landing exactly where it should. You’re standing in your kitchen or bathroom, scissors poised at the perfect angle, watching dark strands fall away to reveal clean lines beneath. This moment, repeated dozens of times across a head, transforms a simple Saturday into barber-quality results. That’s the real appeal of learning how to cut men’s hair with scissors: not just saving money, but gaining the control and satisfaction that comes from mastering a tangible skill.
For anyone serious about haircare, professional-quality trims feel luxurious but expensive. A decent men’s haircut in the UK runs £20–£40, and if you’re cutting hair regularly—whether for yourself, family members, or friends—those costs compound quickly. Yet many people assume barbering requires years of training. The truth is sharper and more encouraging: with the right technique, proper tools, and understanding of men’s hair growth patterns, you can deliver genuinely professional results at home. This isn’t about hacking away randomly; it’s about learning systems that stylists use daily.
Why Understanding Hair Cutting Matters
Before scissors touch hair, you need to understand what you’re working with. Men’s hair varies widely in texture, growth direction, and density. Some hair grows straight down, while other hair spirals or waves. Cowlicks—those stubborn spots where hair grows at an odd angle—appear on most men’s heads, usually at the crown or hairline. These aren’t mistakes; they’re predictable patterns that affect how you approach each cut.
The length of the hair you’re cutting also determines your technique. Cutting a #1 clipper-length fade is entirely different from trimming a longer style where scissors are your primary tool. Most mistakes happen when people apply the same cutting philosophy to every length. A 5cm length needs a different approach than a 15cm pompadour.
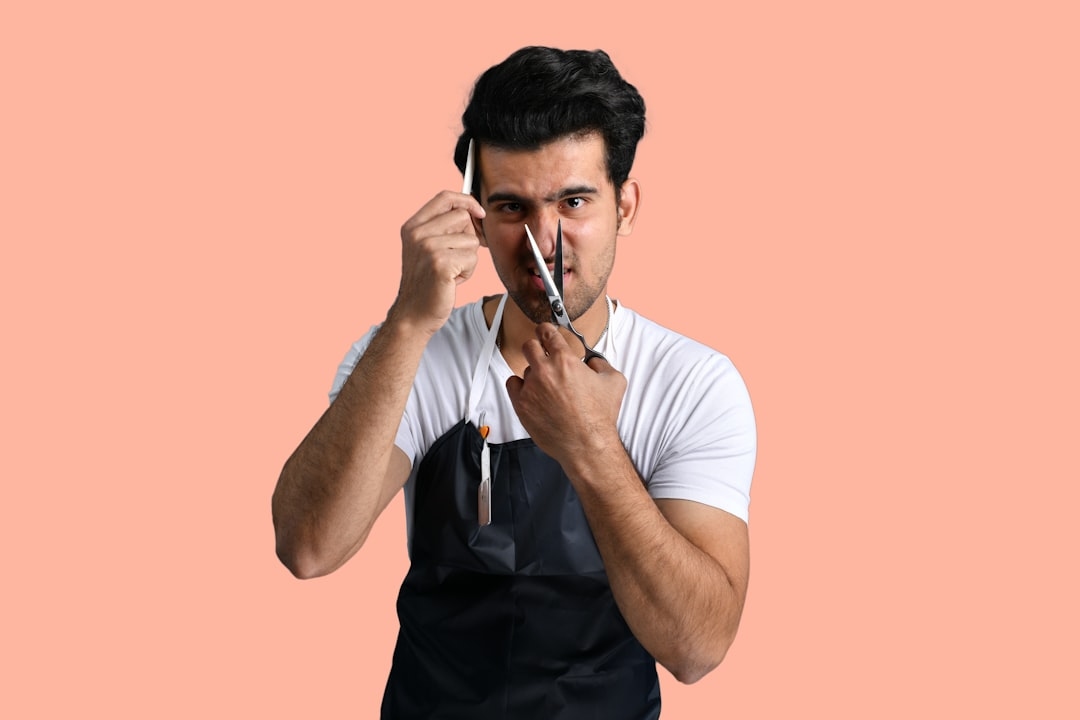
Essential Tools: Why Quality Scissors Make the Difference
Not all scissors are created equal. Dull kitchen scissors or office scissors will drag through hair, causing split ends and uneven cuts. Professional hair scissors—specifically designed for cutting hair—cost between £30 and £150 for quality options available in the UK. You don’t need the most expensive ones, but investing in a decent pair is non-negotiable.
What defines quality hair scissors? Sharpness matters most. The blades should cut a single strand of hair cleanly without any tension. Convex edges (curved blades) work better for this than straight blades, offering more control and precision. Ergonomic handles reduce hand fatigue during longer cutting sessions—crucial if you’re cutting multiple people’s hair.
Beyond scissors, gather these tools:
- A fine-tooth comb for sectioning and guiding cuts
- Spray bottle for misting hair (damp hair cuts more easily)
- Hair clippers with guards for fading or shorter sections (optional but useful)
- Hairdressing cape or towel to catch clippings
- Mirror or two mirrors for seeing the back and sides
Many professionals source scissors from UK brands like Jaguar or Japanese manufacturers like Kamisori. A mid-range pair from a specialist supplier (around £60–£80) will last years if properly maintained. Store them in a protective case and never let them dull—this is a sustainability choice too, as quality tools reduce waste compared to cheaply made alternatives that wear out quickly.
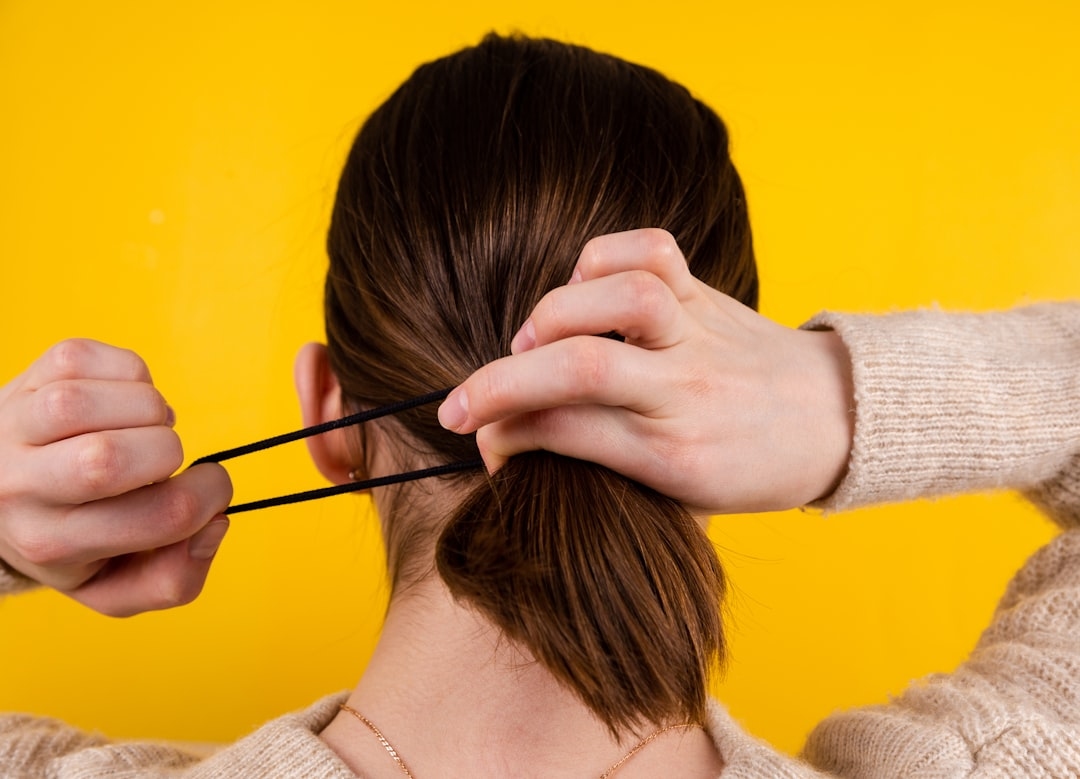
Preparation: The Foundation of Every Good Cut
Success begins before you cut a single strand. Start with clean, damp hair—but not soaking wet. Hair is actually more delicate when dripping wet; damp hair (about 50-70% dry) cuts more predictably and feels less fragile. Spray a fine mist and work through the hair with your comb, removing tangles completely. If hair is curly, you’ll see the true curl pattern when damp, which affects how much length to leave for the final styled look.
Section the hair into four zones: a top crown section, left and right sides, and back. Use clips to keep sections separated. This prevents you from accidentally cutting too much from one area and gives you a clear system to work systematically. Most barbers work front to back or side to side with this sectioning method because it maintains consistency.
Positioning matters. Seat the person at the right height so you can see everything without bending awkwardly. Your own posture affects cut quality—if you’re straining to see, your hand angles shift slightly, affecting the cut. Professional barber chairs adjust for exactly this reason, but a simple dining chair works fine at home.
How to Cut Men’s Hair with Scissors: Core Techniques
There are three primary cutting techniques used by professionals. Understanding each one lets you choose the right approach for different hair types and styles.
Scissor-Over-Comb Technique
This is the workhorse of men’s cutting. Hold the comb flat against the scalp and draw it upward through the hair. As it moves up, use scissors to trim the hair that sits on top of the comb. This creates a blended, graduated look and works beautifully on sides and back sections. The key is moving the comb at a consistent angle—typically 45–90 degrees depending on how much taper you want.
Start conservatively: remove slightly less hair than you think you need. You can always cut more, but adding length back is impossible. Most beginners rush this step; professionals often make 10–15 passes through the same section to gradually achieve the desired length rather than one aggressive cut.
Point Cutting
Hold the scissors vertically and cut into the ends of the hair using the tips of the blades, not the full blade length. This creates texture and definition rather than a blunt line. It’s ideal for disconnected styles, textured tops, and creating choppy layers. Point cutting removes less bulk than other techniques, making it valuable when you want to maintain volume while cleaning up ends.
Slide Cutting
Close the scissors partially so the blades are barely open, then slide them down the length of the hair while cutting. This creates a feathered, tapered effect and blends sections together smoothly. It’s particularly useful for fading and creating seamless transitions between different lengths. Slide cutting requires more control and hand-eye coordination than other techniques.
Step-by-Step Cutting Process
Here’s how professional cuts actually happen, broken into practical steps:
1. Establish Your Guide
Cut a short vertical section from the crown, leaving about 3–5cm depending on the style. This becomes your length guide. Every other section you cut will be referenced against this, ensuring consistency across the head. Professionals call this the “guideline,” and getting it right early prevents frustration later.
2. Work the Sides
Using scissor-over-comb, work from just above the ear upward toward the crown. Make multiple passes, gradually removing hair. Create a slight graduation—slightly longer on top, shorter toward the ear—which follows natural head contours. The number of passes depends on how short the style needs to be, but expect 3–5 passes per side.
3. Define the Back
The back section often requires the most attention because it’s hardest to see. Use two mirrors if possible—one in front, one behind—to monitor your progress. Cut vertically from the nape upward, again using multiple passes. Blend the back into the sides so no obvious line separates them.
4. Taper the Hairline
Use point cutting or slide cutting around the nape and ears, creating clean lines. This detail work separates amateur home cuts from professional ones. Spend extra time here; a sharp, clean hairline adds polish and makes the entire cut look intentional.
5. Shape the Top
Once sides and back are done, tackle the longer hair on top. If it’s significantly longer than the sides, you may use clippers with a guard to remove bulk first. Then use point cutting or vertical scissor work to create texture and refine the shape. Remember that wet hair looks longer; dry hair shrinks, so cut slightly longer than your target to account for this.
6. Final Check and Dry Cut
Always do a final review when hair is completely dry. Blow-dry the hair into its natural style, as this reveals any uneven spots. Damp hair can hide mistakes that become obvious when dry. Make small refinements with point cutting as needed. This step prevents the dreaded post-haircut surprise when the person gets home and the hair looks different dried.
Common Mistakes to Avoid
Even armed with good technique, certain errors derail cuts repeatedly. Learning these pitfalls saves countless do-overs:
Cutting too much too fast. Beginners often remove too much length early, panicking when the cut looks short. Hair doesn’t grow back overnight. Work conservatively with multiple light passes rather than aggressive single cuts.
Ignoring the growth pattern. Hair has a mind of its own. Cowlicks and whorls exist; fighting them creates awkward shapes. Work with the natural growth direction, not against it. Sometimes this means leaving slightly more length on problem areas.
Inconsistent hand angle. The angle at which you hold scissors and comb determines the cut quality. If your angle drifts during a section, you’ll get uneven results. Slow down and maintain consistent positioning.
Skipping the final dry check. This truly separates professionals from amateurs. Cutting wet and assuming it’ll look right dry causes regret. That extra 5 minutes of blow-drying reveals mistakes you can fix before finishing.
Dull scissors. This deserves its own emphasis. Dull scissors cause split ends, create uneven cuts, and increase hand fatigue. Have scissors professionally sharpened annually or use a honing steel between sharpening sessions.
How to Cut Men’s Hair with Scissors for Different Styles
Different men’s styles require different approaches. Your technique adapts based on the desired look:
Classic Short Crop
Keep everything between 6–10mm with slight texture on top. Use clippers with a guard on sides (usually #1 or #1.5), then use point cutting on the top section to add definition. This style is forgiving because minimal length remains, reducing obvious mistakes.
Textured Quiff or Pompadour
Leave 5–8cm on top with tapered sides. Use scissor-over-comb on the sides for neat fading, then switch to point cutting on top to create the texture that makes these styles work. The disconnection between sides and top is intentional here, creating visual interest.
Longer Casual Length
For styles 10cm or longer, use slide cutting to blend sections and create movement. Avoid blunt horizontal lines; instead, create flowing transitions with slightly longer pieces throughout. These styles benefit from more frequent maintenance trims (every 4–6 weeks) because longer hair shows missed spots more obviously.
Aftercare and Sustainability Considerations
Professional results extend beyond the cutting moment. After finishing, use a barber’s edge razor (if comfortable) to clean up the very fine hairs along the hairline—this creates that crisp, expensive-looking finish. Have the person shampoo and style normally; this lets them see the final result as they’ll actually wear it.
From a sustainability perspective, home cutting reduces waste compared to salon visits. Professional salons generate significant hair waste, though reputable ones recycle or donate it. By cutting at home, you control the entire waste cycle. Quality scissors that last decades also represent lower environmental impact than cheap tools replaced frequently. If you’re cutting regularly for multiple family members, you’re genuinely reducing your household’s beauty industry carbon footprint.
FAQ: Common Questions About Cutting Men’s Hair with Scissors
Q: Can I use regular kitchen scissors for hair cutting?
A: No. Kitchen scissors are dull relative to hair-cutting scissors, cause split ends, and provide poor control. The investment in proper hair scissors (£30–£80) pays for itself after just one or two salon visits avoided.
Q: How often should men get their hair cut?
A: Every 3–6 weeks depending on style length and growth rate. Shorter styles show growth faster; longer styles can go 6–8 weeks. Regular maintenance cuts look sharper than occasional dramatic cuts.
Q: What’s the difference between cutting wet and dry hair?
A: Wet hair is easier to cut (feels less resistant), shows the natural curl pattern, and reveals true length. Dry hair shrinks 10–15% shorter than wet hair, so it’s harder to judge final length. Most professionals cut damp, then dry to verify.
Q: Should I cut in the direction of hair growth?
A: Mostly yes. Cutting with the growth direction (called “with the grain”) creates cleaner cuts. Cutting against it can create split ends. However, you’ll sometimes need to work at angles to achieve certain shapes—technique matters more than strict directional rules.
Q: How do I handle a cowlick?
A: Leave slightly more length over cowlicks; they’ll settle with longer hair. If the style requires shorter length, accept that it’ll need blow-drying to position correctly. Never fight natural growth patterns with extreme cutting angles.
Taking Your Skills Forward
Mastering how to cut men’s hair with scissors opens real possibilities: saving money on personal grooming, helping friends and family, or even building toward professional work. The learning curve exists—your first few cuts won’t match salon quality. But each cut teaches you something. After five or six attempts, your hand angle becomes automatic. After ten, you’ll anticipate growth patterns. After twenty, you’ll understand why certain styles suit certain head shapes.
The depth of knowledge separating amateur cuts from professional ones isn’t mysterious. It’s technique (which you can learn), the right tools (which you can buy), and repetition (which you can practice). Start with friends forgiving enough to tolerate minor imperfections, keep your scissors sharp, and approach each head with the respect it deserves. The satisfaction of delivering a genuinely good haircut—one that makes someone feel sharper, more confident—beats the cost savings alone.