Contents:
- What is Dip Dyeing and Why It’s Having a Moment
- Choosing Your Dip Dye Colour: Strategy and Contrast
- Home Dip Dyeing vs. Professional Salon Treatment
- DIY At-Home Dip Dyeing
- Professional Salon Dip Dyeing
- Step-by-Step Guide: How to Dip Dye Hair at Home
- What You’ll Need
- Preparation (30 minutes before dyeing)
- Application (20-30 minutes)
- Processing (25-45 minutes)
- Rinse and Care (15 minutes)
- Dip Dye Cost Breakdown for 2026
- Maintaining Your Dip Dye: Colour Longevity and Care
- Practical Tips for a Flawless Dip Dye Experience
- Get a Second Pair of Hands
- Test the Colour First
- Start Conservative with Your Dip Line
- Consider Your Undertones
- Account for Fading Patterns
- Common Mistakes to Avoid
- Dip Dyeing for Different Hair Types
- Fine or Thin Hair
- Thick or Coarse Hair
- Previously Damaged or Bleached Hair
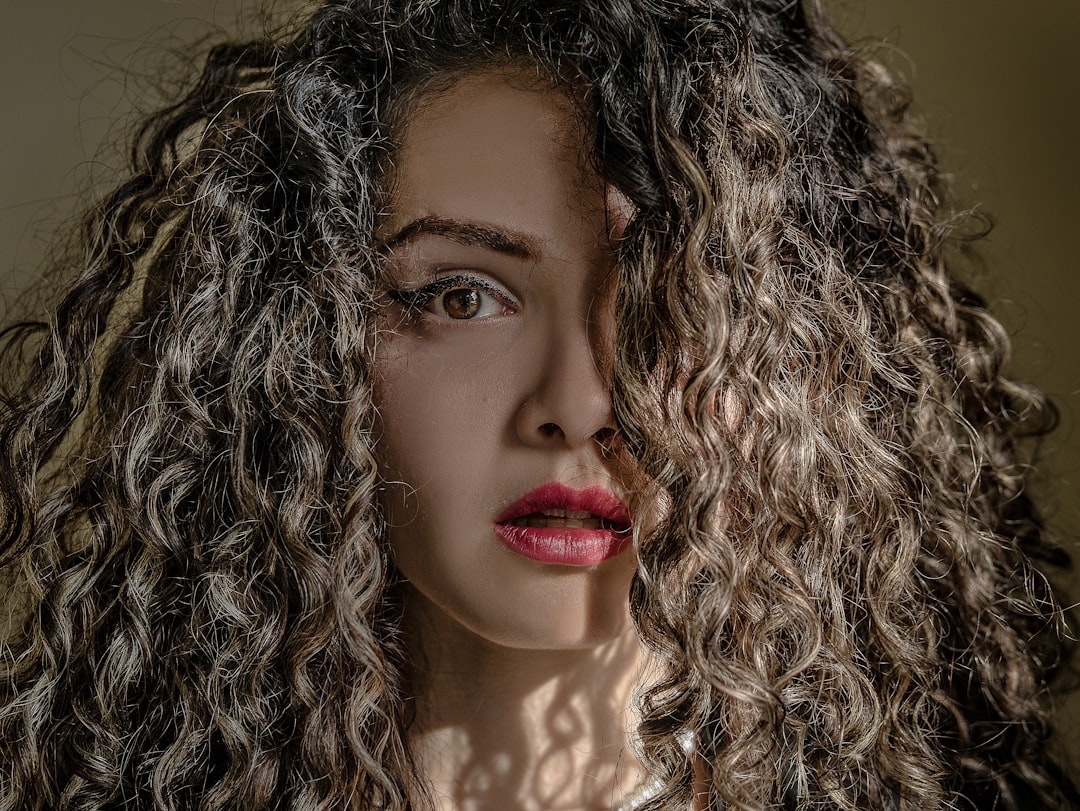
- Curly or Textured Hair
- Frequently Asked Questions about Dip Dyeing
- How long does dip dye last?
- Can I dip dye my hair if it’s already coloured?
- Will dip dyeing damage my hair?
- Can I dip dye short hair?
- What’s the difference between dip dyeing and balayage or ombré?
- Your Next Steps: Ready to Transform Your Hair
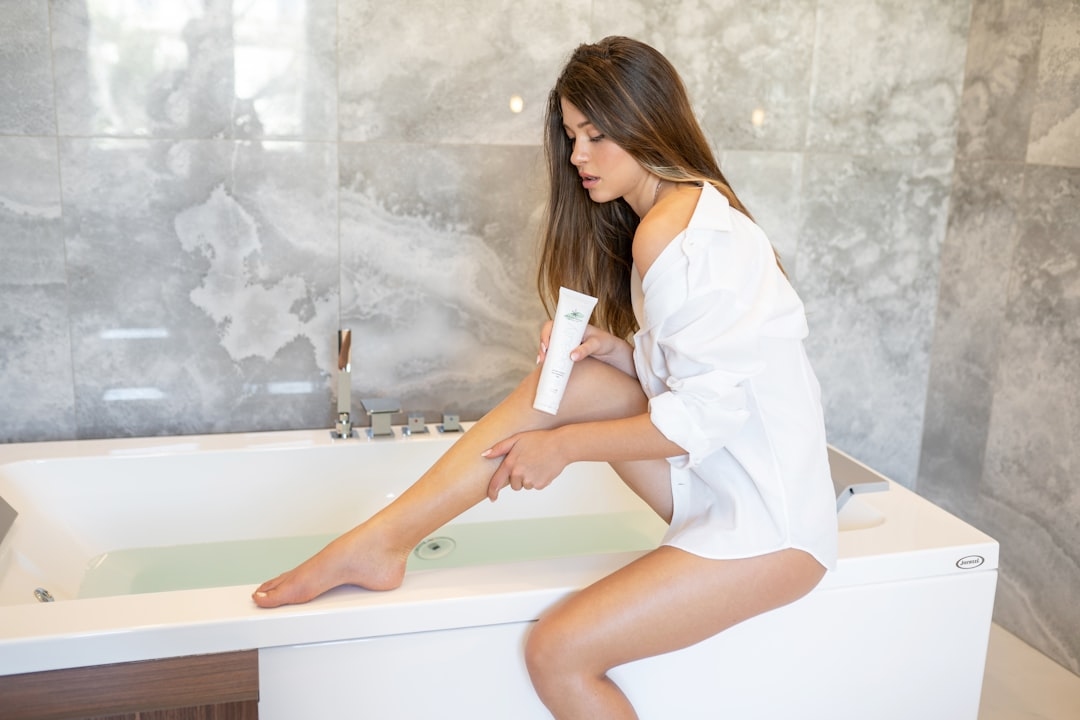
Imagine running your fingers through hair that fades from rich, deep tones at the roots to a striking contrast colour at the tips. That’s dip dyeing—one of the most transformative yet surprisingly achievable hair techniques of 2026. The sun catches your ends and reveals a flash of colour that feels deliberately artistic, not accidental.
What is Dip Dyeing and Why It’s Having a Moment
Dip dyeing is a hair colouring technique where you apply colour to only the lower portion of your hair shaft, leaving the natural colour or original tone intact above. Unlike full highlights or balayage, dip dyeing creates a clean, intentional colour break—usually between 2-6 inches from the ends, depending on how dramatic you want the effect.
The appeal is multifaceted. You get a striking visual transformation without committing your entire head to a new colour. If you decide the shade isn’t for you, you can simply grow it out or trim the dyed section. The technique works brilliantly on virtually any base colour—whether you’re starting with black, brown, blonde, or even an existing dyed shade. A recent survey by UK salon professionals found that dip dye requests increased 34% year-on-year through 2025-2026, particularly among people aged 18-35 seeking low-commitment colour changes.
Choosing Your Dip Dye Colour: Strategy and Contrast
The most successful dip dyes create visible contrast between your base colour and your chosen shade. Consider these proven combinations:
- Black or dark brown base: Jewel tones (emerald, sapphire, deep purple), metallics (copper, bronze), or warm reds pop beautifully against dark roots.
- Medium brown base: Nearly any colour works—try burgundy, rose gold, caramel, or soft pastels for a more subtle look.
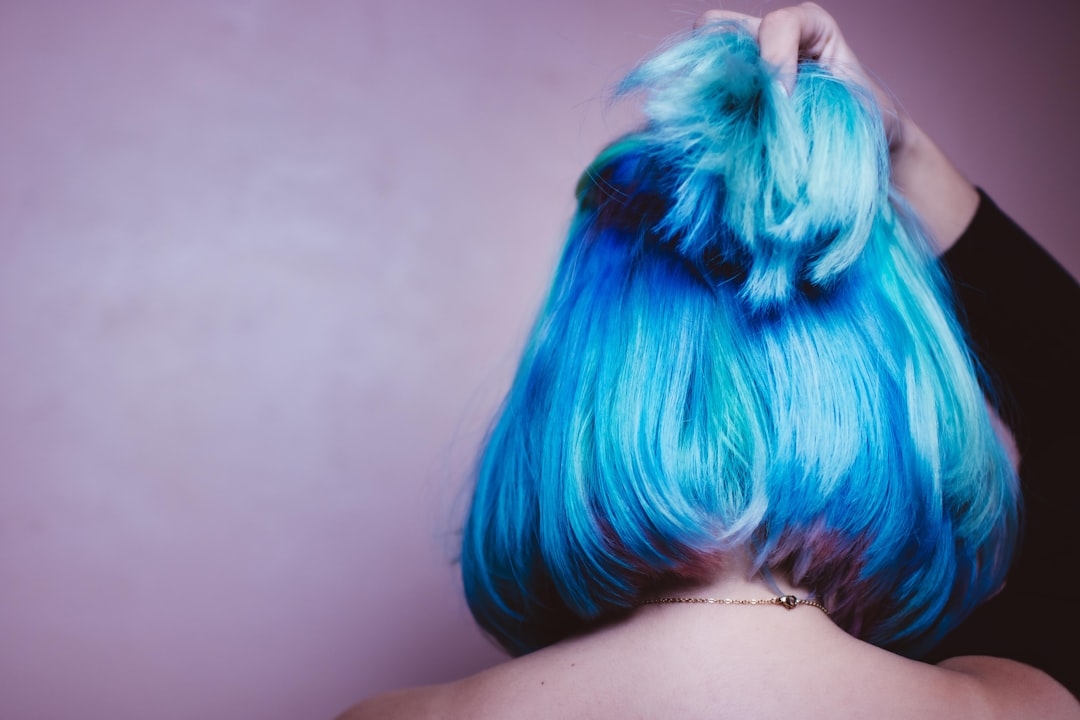
- Blonde base: Bold colours like lavender, pink, teal, or peachy tones create haute couture effects; pastels deliver understated elegance.
- Red or auburn base: Deeper purples, forest greens, or additional dimension in copper and gold complement warm undertones.
Think about your skin tone, eye colour, and lifestyle when selecting your dip dye shade. A hairstylist’s rule of thumb: if you love it in the box or swatch, you’ll likely love it in your hair. However, semi-permanent colours can process slightly differently depending on your starting shade, so checking swatch results online from real users with similar hair to yours prevents disappointment.
Home Dip Dyeing vs. Professional Salon Treatment
DIY At-Home Dip Dyeing
Doing this yourself at home requires patience but saves considerably on cost. Budget around £6-18 depending on the colour brand you choose. Basic semi-permanent dyes from brands like Directions, Manic Panic, or Crazy Colour range from £8-12 per bottle; permanent dyes cost £6-10. You’ll want to purchase two bottles if you have thick, shoulder-length hair or longer, as one bottle provides coverage for roughly waist-length, fine-to-medium density hair.
The advantage of DIY is complete control over exactly where the colour breaks. You work at your own pace, and there’s no time pressure. The disadvantage is that reaching the back of your own head cleanly takes practice, and even slight mistakes become obvious when colour applications are uneven.
Professional Salon Dip Dyeing
A qualified colourist brings skill, precision, and professional-grade products. Salon treatments typically cost between £40-150, depending on your location, hair length, and the salon’s pricing tier. London salons and major city centres charge at the premium end; smaller towns often offer the same technique for £40-70.
Salons have several advantages: they handle back sections with ease, apply colour more uniformly, and can advise on processing times and heat damage risk. Many salons also use conditioning treatments during the process, leaving your dipped ends feeling healthier than at-home applications. Additionally, if something doesn’t suit you immediately after, your stylist can adjust the shade or tone before you leave.
Step-by-Step Guide: How to Dip Dye Hair at Home
What You’ll Need
- Semi-permanent or permanent hair dye (1-2 bottles depending on hair thickness)
- Plastic mixing bowl (avoid metal, which can react with dye)
- Plastic or wooden applicator brush
- Sectioning clips (4-6)
- Petroleum jelly or barrier cream
- Gloves (typically included in dye boxes)
- Old towel or cape to protect your clothes
- Comb or detangling brush
- Spray bottle with water
Preparation (30 minutes before dyeing)
Wash your hair 2-3 days before dyeing, not the day of. Natural oils protect your scalp and help the dye process evenly. If your hair is tangled, comb through gently when dry to prevent breakage during application.
Decide your dip line—the point where colour stops. For shoulder-length hair, this is typically 3-4 inches from the ends. Longer hair might stretch this to 4-6 inches for proportion. Shorter, cropped styles work beautifully with 2-3 inches of colour. Use a spray bottle to lightly dampen only the section you’re about to dye; damp hair accepts dye more evenly than bone-dry hair, but excess water dilutes the colour.
Section your hair into 4-6 manageable pieces using clips. Imagine dividing your head into quadrants, then subdividing each. Finer, longer hair needs more sections; shorter or thicker hair can manage with fewer.
Application (20-30 minutes)
Mix your dye according to packet instructions. If using semi-permanent colour, you typically mix colour with developer or apply directly depending on the brand. Read instructions carefully—timing differences between brands vary significantly.
Unclip one section and hold it straight. Starting at the ends, brush dye upward toward your predetermined dip line, rotating the section to ensure all sides receive colour. The application doesn’t need to be pixel-perfect; slight gradation looks intentional and modern. Work through each section methodically, reapplying dye if you notice thin patches.
As you work, ensure the dye line remains consistent across all sections. Step back occasionally and check in the mirror—it’s easier to add more dye to a lighter area than to remove excess from an overdyed section.
Processing (25-45 minutes)
Once all sections are saturated, check the packet instructions for processing time. Semi-permanent colours typically process for 25-30 minutes; permanent dyes might require 35-45 minutes. Set a timer. Heat accelerates processing—wrapping your dipped ends in cling film or a plastic cap speeds up the process by approximately 10 minutes, though this isn’t necessary.
Whilst waiting, resist the urge to apply dye higher up unless you intended to do so from the start. Dye naturally creeps slightly upward as it processes, so if your dip line looks close to where you want it, leave it.
Rinse and Care (15 minutes)
Rinse with cool water until the water runs clear. Use cool water, not hot—heat opens the hair cuticle and allows colour to leach out. Apply the conditioner included with your dye kit, or use a colour-safe conditioner, and leave it for 2-3 minutes. Rinse again with cool water.
Gently squeeze out excess water with a microfibre towel or soft t-shirt rather than wringing, which causes frizz and cuticle damage. Allow your hair to air-dry if possible; heat styling immediately after dyeing can stress freshly coloured strands.
Dip Dye Cost Breakdown for 2026
| Dip Dye Option | Estimated Cost (GBP) | Time Required |
|---|---|---|
| Semi-permanent dye (DIY, shoulder-length) | £8-18 | 1-2 hours |
| Permanent dye (DIY, shoulder-length) | £6-15 | 1.5-2 hours |
| Professional salon (short-medium hair) | £40-80 | 2-3 hours |
| Professional salon (long hair) | £80-150 | 2.5-3.5 hours |
Maintaining Your Dip Dye: Colour Longevity and Care
The lifespan of your dip dye depends on whether you’ve used permanent or semi-permanent colour, your hair type, and your aftercare routine. Semi-permanent colours typically last 4-6 weeks with proper care; permanent colours fade gradually over 8-12 weeks but never fully wash out.
Extend colour vibrancy by washing with lukewarm or cool water using colour-safe shampoo and conditioner. Regular shampoos contain sulphates that strip colour molecules from the hair shaft. Switch to colour-safe products immediately after dyeing—brands like Bleach London, Lee Stafford, and Schwarzkopf offer affordable options (£5-12 per bottle).
Limit heat styling in the first week after dyeing; your colour is still setting. When you do use heat, apply a heat protectant spray (£4-8) beforehand. Weekly deep conditioning treatments, especially for the dipped section, prevent the colour from looking dull and brassy. Leave a nourishing mask on for 15 minutes twice weekly during the first month.
Chlorine in swimming pools can shift colour tones, particularly lighter shades. If you swim regularly, wet your hair with tap water and apply leave-in conditioner before entering the pool—this prevents your hair from absorbing as much chlorine.
Practical Tips for a Flawless Dip Dye Experience
Get a Second Pair of Hands
Asking a friend or family member to help, particularly for the back sections, dramatically improves application evenness. They can spot areas you’ve missed and ensure your dip line is level across the back of your head.
Test the Colour First
Always do a patch test 48 hours before applying dye, especially if your hair is previously coloured or damaged. Mix a tiny amount of dye and apply to a hidden section (the underside of your hair at the nape). This prevents surprise allergic reactions or unexpected colour results.
Start Conservative with Your Dip Line
It’s easier to dye more hair if you want a deeper dip later than to undo an overeager first attempt. Start 4 inches from the ends on your first try. Future applications can creep slightly higher as you gain confidence.
Consider Your Undertones
If you have warm undertones (yellow or golden hues in your skin), cool-toned dyes (blues, purples, silvers) create striking contrast. Cool undertones (pink or red) pair beautifully with warm dyes (reds, golds, coppers). Warm-to-cool or cool-to-warm combinations create the most visually arresting dip dyes.
Account for Fading Patterns
Semi-permanent colours fade unevenly—the brightest sections fade first, leaving muddier tones. Choose shades you’ll still enjoy as they mellow. Vibrant magentas become softer pinks; bright blues shift to teal then grey-blue.
Common Mistakes to Avoid
Many people apply dye to completely dry hair, resulting in patchy colour absorption. Damp hair accepts dye far more consistently. Another frequent error: applying dye days before you actually need to rinse it out. Semi-permanent colours, particularly, can stain your skin and clothes if left for dramatically longer than recommended. Follow the timer.
Washing with hot water immediately after dyeing strips colour rapidly. Some people lose 20-30% of their colour vibrancy in the first week through hot-water washing. Additionally, using regular (non-colour-safe) shampoo is perhaps the most common reason dip dyes fade disappointingly fast.
Finally, avoid overlapping dye onto your natural colour unless you intend an ombré effect rather than clean dip dyeing. The overlap creates a blurry line rather than the distinct colour break that defines this technique.
Dip Dyeing for Different Hair Types
Fine or Thin Hair
Fine hair absorbs dye quickly and can look overly saturated with colour if you’re not careful. Reduce processing time by 5-10 minutes compared to normal guidelines. Use less dye per application—one coat is often sufficient. The colour will appear richer in fine hair than in thicker textures.
Thick or Coarse Hair
Coarse hair requires more dye and longer processing times (add 5-10 minutes to guidelines). Ensure you’ve fully saturated each section before moving on. You might need two bottles of dye rather than one if your hair is very thick or very long.
Previously Damaged or Bleached Hair
Porous hair (from previous bleaching, relaxing, or colour treatments) absorbs dye differently. It may process faster and appear darker than expected. Consider a strand test with semi-permanent colour first. If you’re planning to go very light or very blonde before dip dyeing, space these treatments 2-3 weeks apart to minimize damage.
Curly or Textured Hair
Section even more carefully with curly hair—at least 6-8 sections to ensure colour reaches all the curl patterns. The dip line might be harder to define neatly with curls, so consider starting slightly lower (5-6 inches from ends) to account for curl movement. Deep conditioning is non-negotiable after dyeing textured hair.
Frequently Asked Questions about Dip Dyeing
How long does dip dye last?
Semi-permanent dyes last 4-8 weeks depending on the brand and your washing frequency. Permanent dyes don’t wash out but gradually fade over 8-12 weeks. Colour-safe products and minimal heat styling extend longevity significantly. Most people need a refresh every 4-6 weeks if they want vibrant colour.
Can I dip dye my hair if it’s already coloured?
Yes, absolutely. If your hair is previously dark-coloured, you can dip dye over it with any colour. Previously light-coloured or blonde hair works best with darker dips or jewel tones. Red or orange bases can shift other colours unpredictably—try a strand test first. If your hair has been lightened extensively, consult a professional before applying additional colour.
Will dip dyeing damage my hair?
Semi-permanent dyes contain no ammonia or peroxide, so they’re gentler than permanent colour—more like a stain than a chemical alteration. Permanent dyes do cause some structural change, but dip dyeing only the ends (which are naturally oldest and more resilient) minimises visible damage. Deep conditioning weekly after dyeing restores moisture and strength.
Can I dip dye short hair?
Absolutely. Short hair works beautifully dip-dyed, though you’ll need to adjust where the colour breaks. On a crop, 1.5-2.5 inches of colour at the tips creates the same effect as 4-6 inches on longer hair. A bob or shoulder-length cut shows dip dye particularly well.
What’s the difference between dip dyeing and balayage or ombré?
Dip dyeing creates a distinct line where colour begins—usually cleanly demarcated 2-6 inches from the ends. Balayage hand-paints colour for a more blended, natural-looking effect. Ombré transitions gradually from dark roots to light ends with no specific colour break. Dip dye is the most intentional, artistic-looking of the three techniques.
Your Next Steps: Ready to Transform Your Hair
Dip dyeing offers genuine transformation with minimal commitment. Whether you choose to DIY with a £10 bottle of colour or book a salon appointment with a skilled colourist, this technique delivers impact. The beauty lies in its flexibility—you control the depth, the colour, and whether it becomes a permanent part of your style or a temporary experiment.
Start by browsing inspiration images of dip dyes in your chosen colour on hair similar to yours. This gives you realistic expectations for how the shade will appear. Gather your supplies or book your salon appointment. Then commit to the colour-care routine that keeps your dipped ends looking fresh: cool-water washes, colour-safe products, weekly conditioning, and minimal heat.
Your hair transformation awaits. The contrast between your natural base and a bold dipped colour creates an immediately noteable change that turns heads—and, most importantly, makes you feel visibly, tangibly different in a way that grows out gracefully. That’s the real magic of dip dyeing.