Contents:
- Why Curled Ends Matter for Your Hair’s Overall Appearance
- Essential Tools for Curling Hair Ends
- Blow Dryer with Concentrator Nozzle
- Round Brush Selection
- Velcro Rollers as an Alternative
- Curling Iron or Straightener Option
- Step-by-Step Technique for Curling Hair Ends
- Preparation Stage
- Sectioning Your Hair
- The Brush-Rolling Technique
- Common Mistakes to Avoid When Curling Hair Ends
- Cost Breakdown for Home Curling
- Advanced Techniques for Different Hair Types
- Fine or Thin Hair
- Thick or Coarse Hair
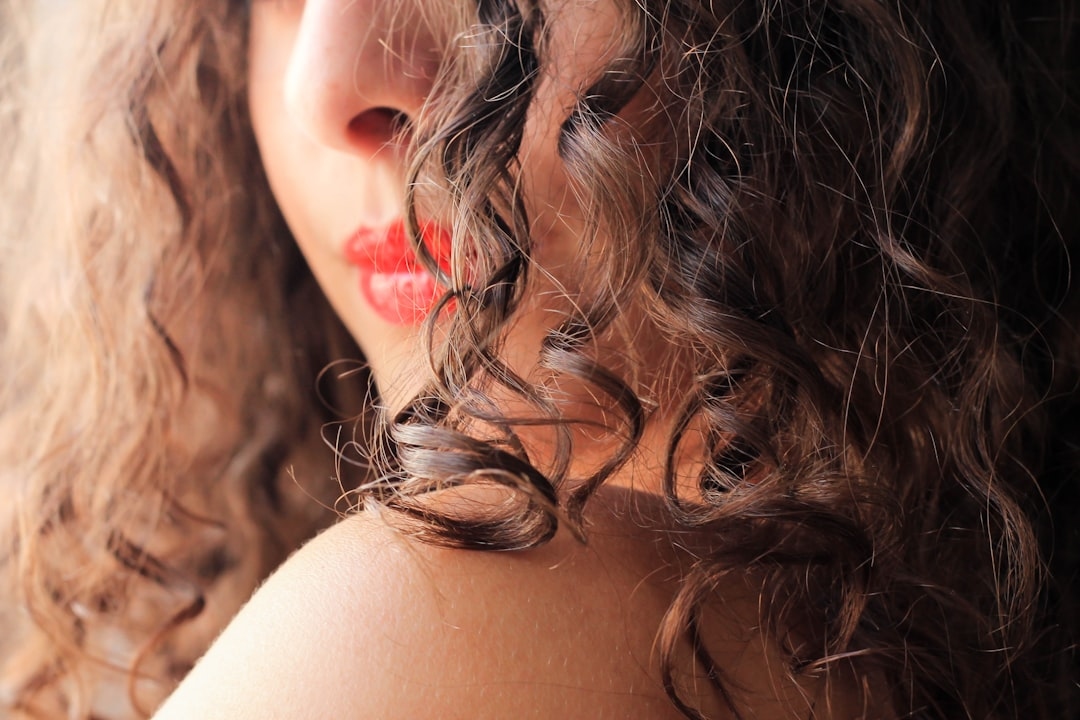
- Curly or Textured Hair
- Short Hair
- Timing: When to Curl Your Ends
- Making Curls Last Throughout the Day
- FAQ Section
- How long does it take to curl hair ends at home?
- Can I curl my hair ends without a blow dryer?
- How often should I curl my hair ends?
- Will curling my ends damage my hair?
- Does hair type affect how easily I can curl the ends?
- Professional Results Without the Professional Price
You’ve just finished blow-drying your hair, and the ends lie flat and lifeless against your shoulders. A simple curl at the ends transforms everything—suddenly your hair looks fuller, healthier, and styled with intention. This is one of the most requested finishing touches in salons across the UK, yet it remains entirely doable at home without expensive equipment or professional training.
Curling the ends of your hair is fundamental to modern styling. It adds movement, creates dimension, and prevents that blunt, stringy appearance that flat ends produce. Whether you’re aiming for loose waves or defined ringlets, the technique requires only basic tools and a bit of practice. The good news: most people already have what they need at home.
Why Curled Ends Matter for Your Hair’s Overall Appearance
Hair stylist Marcus Webb, certified trichologist at the British Institute of Trichology, explains: “Curled ends signal healthy, intentional styling. Flat ends suggest damage or neglect, even on perfectly healthy hair. The curl redirects how light bounces off your strands, creating dimension that makes hair look thicker and more lustrous.”
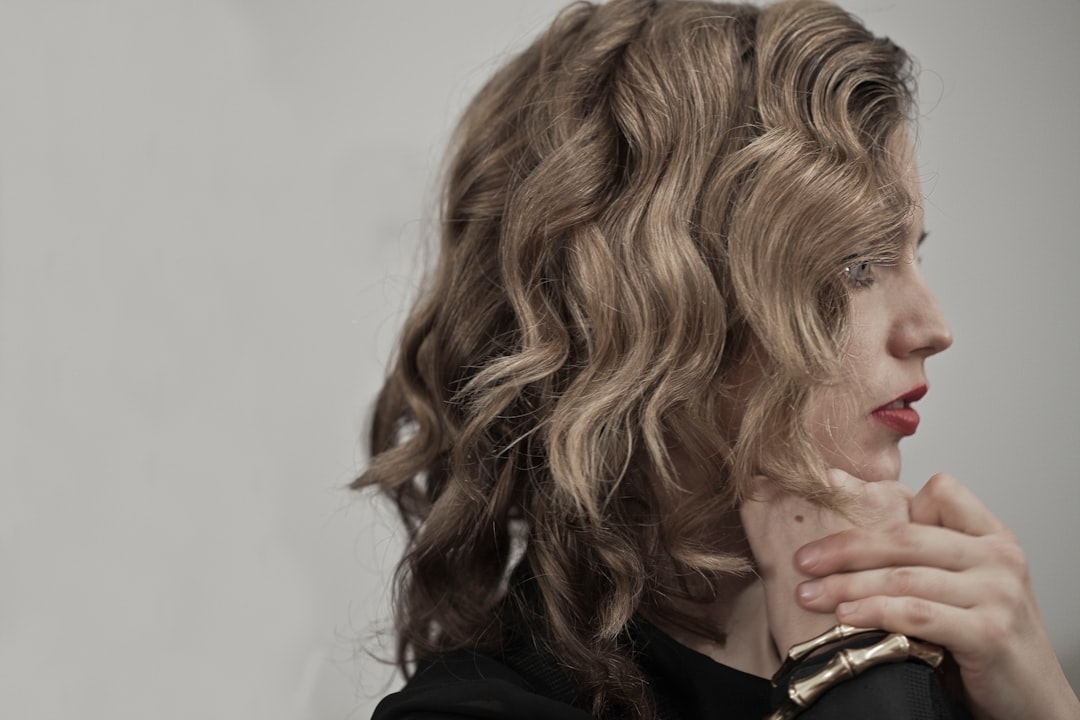
Curled ends accomplish several things simultaneously. They create a polished silhouette rather than a shapeless one. They distribute weight more evenly along the hair shaft. They also help contain flyaways by directing hair inward rather than outward. For fine or thin hair, this curling technique adds the illusion of volume that no product alone can achieve.
The psychological effect matters too. When your hair ends curve inward, it frames your face more flatteringly and creates a subtly lifted appearance around the cheekbones. This is why salon blowouts cost £45-60 in London—much of that price goes toward these final end curls.
Essential Tools for Curling Hair Ends
Blow Dryer with Concentrator Nozzle
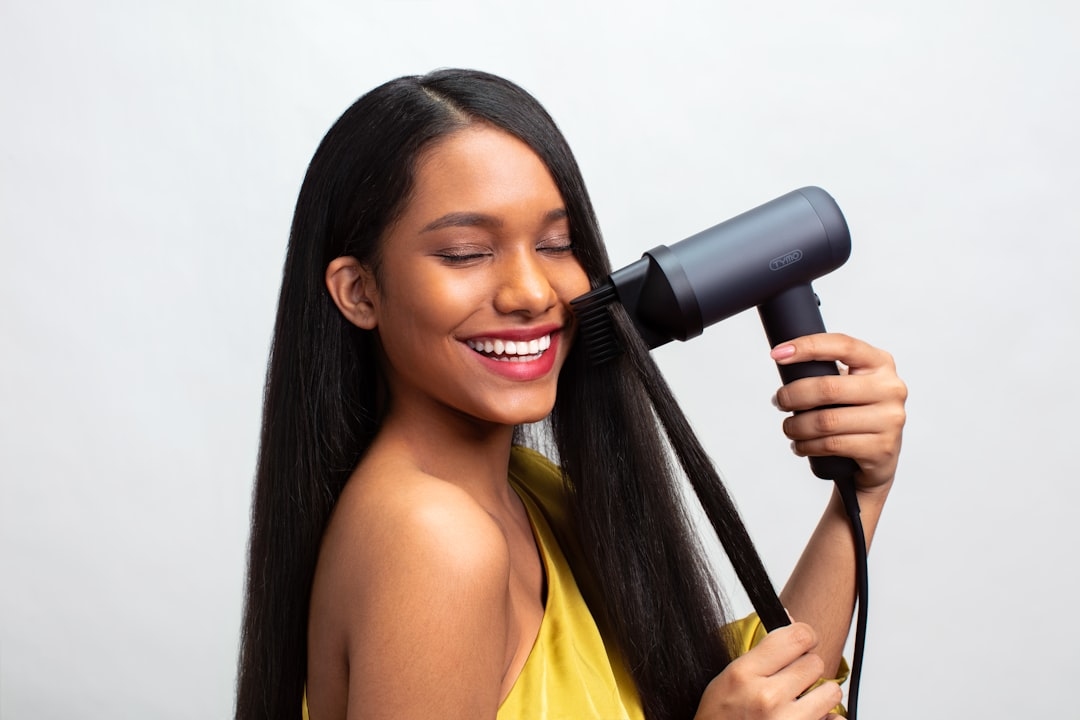
Your primary tool is a standard blow dryer equipped with a concentrator attachment. This narrow nozzle focuses heat and air in a specific direction, essential for precise curling. A mid-range blow dryer costs £25-40 at Boots or Superdrug. The nozzle alone costs £5-8 if purchased separately. Heat settings matter: use medium heat rather than high, which damages ends faster.
Round Brush Selection
Round brushes come in three main sizes. Small brushes (38mm diameter) create tight curls suitable for short hair or thick strands. Medium brushes (44mm) work for most people and create bouncy waves. Large brushes (50mm or more) produce loose, flowing curls that suit longer hair. Quality matters here—cheap brushes shed bristles and don’t distribute heat evenly. Expect to spend £12-25 on a decent round brush.
Velcro Rollers as an Alternative
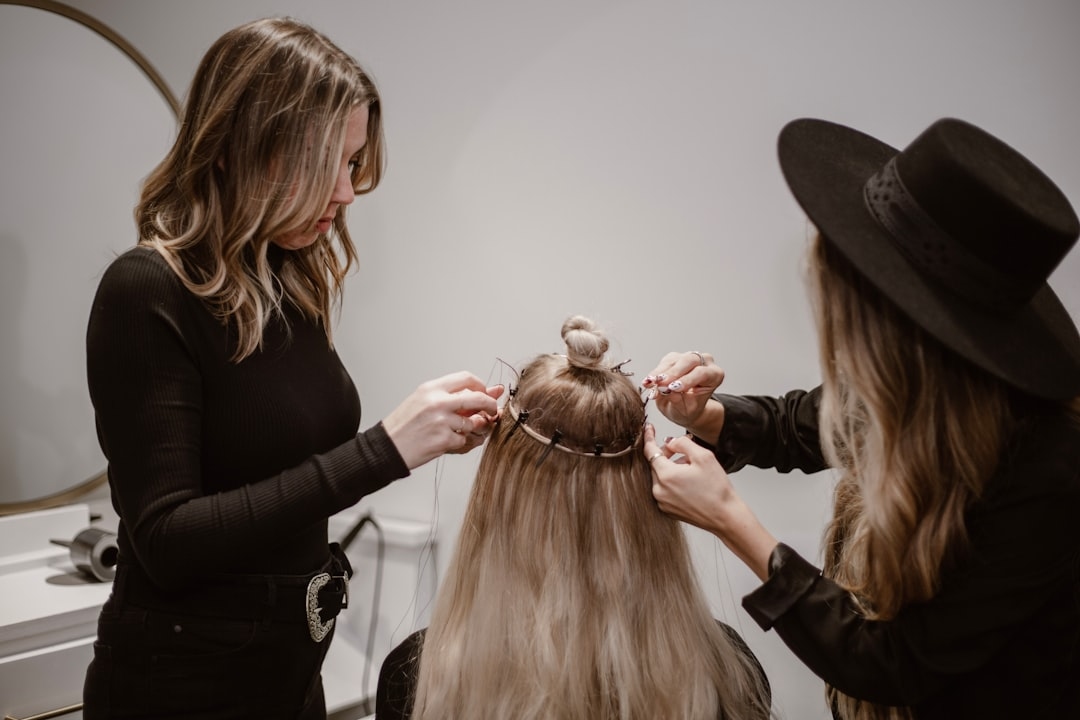
Velcro rollers (also called heated rollers) offer a hands-free option. Heat them for 8-10 minutes, wrap end sections around them, and let them cool while you apply makeup or get dressed. A set of assorted rollers costs £15-30. This method suits people who struggle with blow dryer coordination or have limited arm strength.
Curling Iron or Straightener Option
A straightener with slightly rounded plates can curl ends effectively. Clamp a section at the root and twist it outward as you slide down. Curling irons with 25-32mm barrels work best for ends. Prices range from £20-80 depending on quality. Ghd and Drybar offer premium options (£150-200), but budget alternatives from Argos or Amazon perform adequately for home use.
Step-by-Step Technique for Curling Hair Ends
Preparation Stage
Start with damp hair—towel-dried but not soaking. Hair needs enough moisture to hold a curl shape. If your hair is fully dry, mist it lightly with water from a spray bottle. Dry hair resists curling and the curl fades within hours. Apply a lightweight heat protectant spray; brands like Carol’s Daughter or John Frieda cost £8-12. This step prevents heat damage and extends curl longevity.
Sectioning Your Hair
Divide your hair into four to six sections using clips. Start with a horizontal parting from ear to ear across the top of your head. Then create vertical sections on either side. Thicker hair needs more sections (six or even eight). Each section should be roughly 2 inches wide and no more. Thin sections curl faster and more evenly than thick ones.
The Brush-Rolling Technique
Take the first section and comb it smooth. Position your round brush at the hair roots. Roll the brush away from your face (or toward it, depending on the side). As you roll upward, simultaneously aim your blow dryer at the barrel from the outer edge, not directly into the brush. This dries the hair while heat activates the curl shape.
Hold the brush at the end of each section for 10-15 seconds after heat exposure. This cooling period sets the curl. Remove the brush slowly. If the curl collapses immediately, your hair wasn’t dry enough or hot enough. If the curl remains but looks rigid, you’ve applied too much heat.
Work through all sections. The entire process typically takes 15-25 minutes depending on hair length and thickness. Back sections usually curl tighter than front sections due to heat exposure duration—compensate by reducing drying time on those areas.
Common Mistakes to Avoid When Curling Hair Ends
Mistake one: wrapping hair too tightly around the brush. Excessive tension breaks strands and creates uncomfortable pulling sensations at the scalp. Tension should feel secure but not painful. Mistake two: applying heat inconsistently. Concentrating heat on the brush barrel while neglecting the hair-covered sections creates curls that unwind halfway through your day.
Mistake three: removing the brush too quickly. Hair needs cooling time to set its shape. Fifteen seconds minimum. Many people remove the brush after just 3-5 seconds, then wonder why curls drop by afternoon. Mistake four: using only high heat. Medium heat with longer drying time produces longer-lasting curls than high heat. High heat dries the outer layer quickly while inner layers remain damp, causing uneven curling.
Mistake five: curling the same direction throughout. Alternate directions—roll one section away from the face, the next toward it. This prevents a helmet-like appearance and creates more natural movement. Mistake six: attempting this on unwashed hair. Product buildup and natural oils prevent proper curl formation. Fresh, clean hair curls more readily and holds longer.
Cost Breakdown for Home Curling
Initial investment: blow dryer £30, round brush £15, heat protectant spray £10. Total: £55. This equipment lasts 2-4 years with proper care. Compare this to salon blowouts at £50-60 each. Home curling pays for itself after one or two salon visits.
Ongoing costs involve only replacement products: heat protectant spray at £8-12 per bottle (lasts 2-3 months with regular use). Running a blow dryer for 20 minutes uses approximately £0.15 in electricity. Your per-styling cost after initial investment: roughly £0.50-1.00.
Advanced Techniques for Different Hair Types
Fine or Thin Hair
Use a medium round brush (44mm) and medium heat. Smaller brushes and higher heat damage fine strands visibly. Spray a light texturizing product before curling—this helps the curl grip. Avoid sectioning too finely; four sections suffice. Fine hair curls quickly, so reduce your drying time to 8-10 seconds per section.
Thick or Coarse Hair
Large round brushes (50mm) and medium-high heat work best. Thick hair requires more heat to achieve curl, but doesn’t damage as easily. Section hair more thoroughly—six to eight sections. Use 15-20 seconds of heat per section. Consider a ceramic or ionic brush, which distributes heat more evenly than conventional bristles. Prices range £25-45.
Curly or Textured Hair
Your natural curl pattern affects end curling. Define existing texture rather than fight it. Use the same brush-rolling motion, but focus on smoothing rather than creating from scratch. Medium heat suffices. Many people with naturally curly hair skip curling ends entirely and instead scrunch a curl cream into the ends while damp to enhance existing texture.
Short Hair
Shorter styles (above shoulder length) need small to medium round brushes. The proximity to the scalp requires careful sectioning to avoid tangling. Work quickly as short sections heat rapidly. Short hair curls hold longer because less weight pulls the curl downward. One or two curls per section are sufficient.
Timing: When to Curl Your Ends
The ideal time is shortly after washing and towel-drying. Hair retains 60% of its moisture at this stage, creating the perfect environment for curl formation. Attempting curls on fully dry hair (more than 2 hours post-wash) requires more heat and produces less durable curls.
If you’re styling evening hair and showering in the morning, use a dry shampoo product (Batiste or Pssst, around £3) 30 minutes before curling. This adds texture that helps curls grip. Mist your ends lightly with water again, wait 5 minutes, then proceed with curling.
Making Curls Last Throughout the Day
Application of setting spray is essential. Spray your curls lightly after they’ve cooled completely. Products like Lee Stafford or Tresemmé (£5-8) work well without creating stiffness. Let the spray dry before touching your hair.
Sleep presents your primary curl challenge. A silk pillowcase reduces friction that flattens curls. Alternatively, pin curls gently before bed—don’t wrap tightly, just coil each curl loosely and secure with a small clip. Morning refreshing involves misting ends with water and applying a light curl-refreshing product. No heat necessary.
Your curls typically last 24-36 hours without intervention. Humidity, hair oiliness, and natural texture all affect longevity. Drier climates maintain curls longer. Coastal regions in Scotland or Northern England with higher humidity may see curl drop within 18-24 hours.
FAQ Section
How long does it take to curl hair ends at home?
Most people complete the process in 15-25 minutes, depending on hair length and thickness. As you practice, you’ll develop speed and efficiency. Salon professionals do this in 8-10 minutes but they’re using multiple tools simultaneously and years of experience. Don’t rush—better to take 25 minutes and achieve nice curls than hurry and create inconsistent results.
Can I curl my hair ends without a blow dryer?
Yes. Velcro rollers work without a blow dryer if you use heated rollers, or you can air-dry your hair with rollers in place overnight. A curling iron or straightener also works. However, blow dryer methods provide the quickest results and integrate curling into your regular styling routine most seamlessly.
How often should I curl my hair ends?
Daily heat styling isn’t harmful if you use heat protection products consistently. However, alternating days—curling on days 1, 3, and 5, for example—reduces cumulative heat damage. On non-curl days, refresh yesterday’s curls with a light hairspray or let them rest naturally.
Will curling my ends damage my hair?
Not if done correctly with heat protectant products and appropriate heat settings. Damage comes from excessive heat (high temperatures for long durations), lack of protection, or poor condition hair. Healthy hair curled with heat protection on medium settings experiences no observable damage from this practice.
Does hair type affect how easily I can curl the ends?
Significantly. Fine, straight hair curls easily but doesn’t hold curls long. Thick or naturally curly hair holds curls longer but requires more heat to achieve them. Textured or coily hair may not need explicit curling—enhancing natural texture achieves the desired effect more simply. Work with your hair type rather than against it.
Professional Results Without the Professional Price
Curling your hair ends transforms styling from functional (clean and dry) to polished (styled with intention). The technique costs little to learn, requires modest equipment you’ll use regularly, and takes minimal time once mastered. Start with medium heat and watch how your hair responds. Adjust drying time and brush size based on results. Within three or four sessions, you’ll achieve consistent curls that rival your favourite salon finish—minus the £50-60 price tag each visit.